
Practical Example
For the complete documentation index, see llms.txt. Markdown versions of documentation pages are available by appending
.mdto page URLs; this page is available as Markdown.
Practical Example: A Trend-Following Strategy with SSA
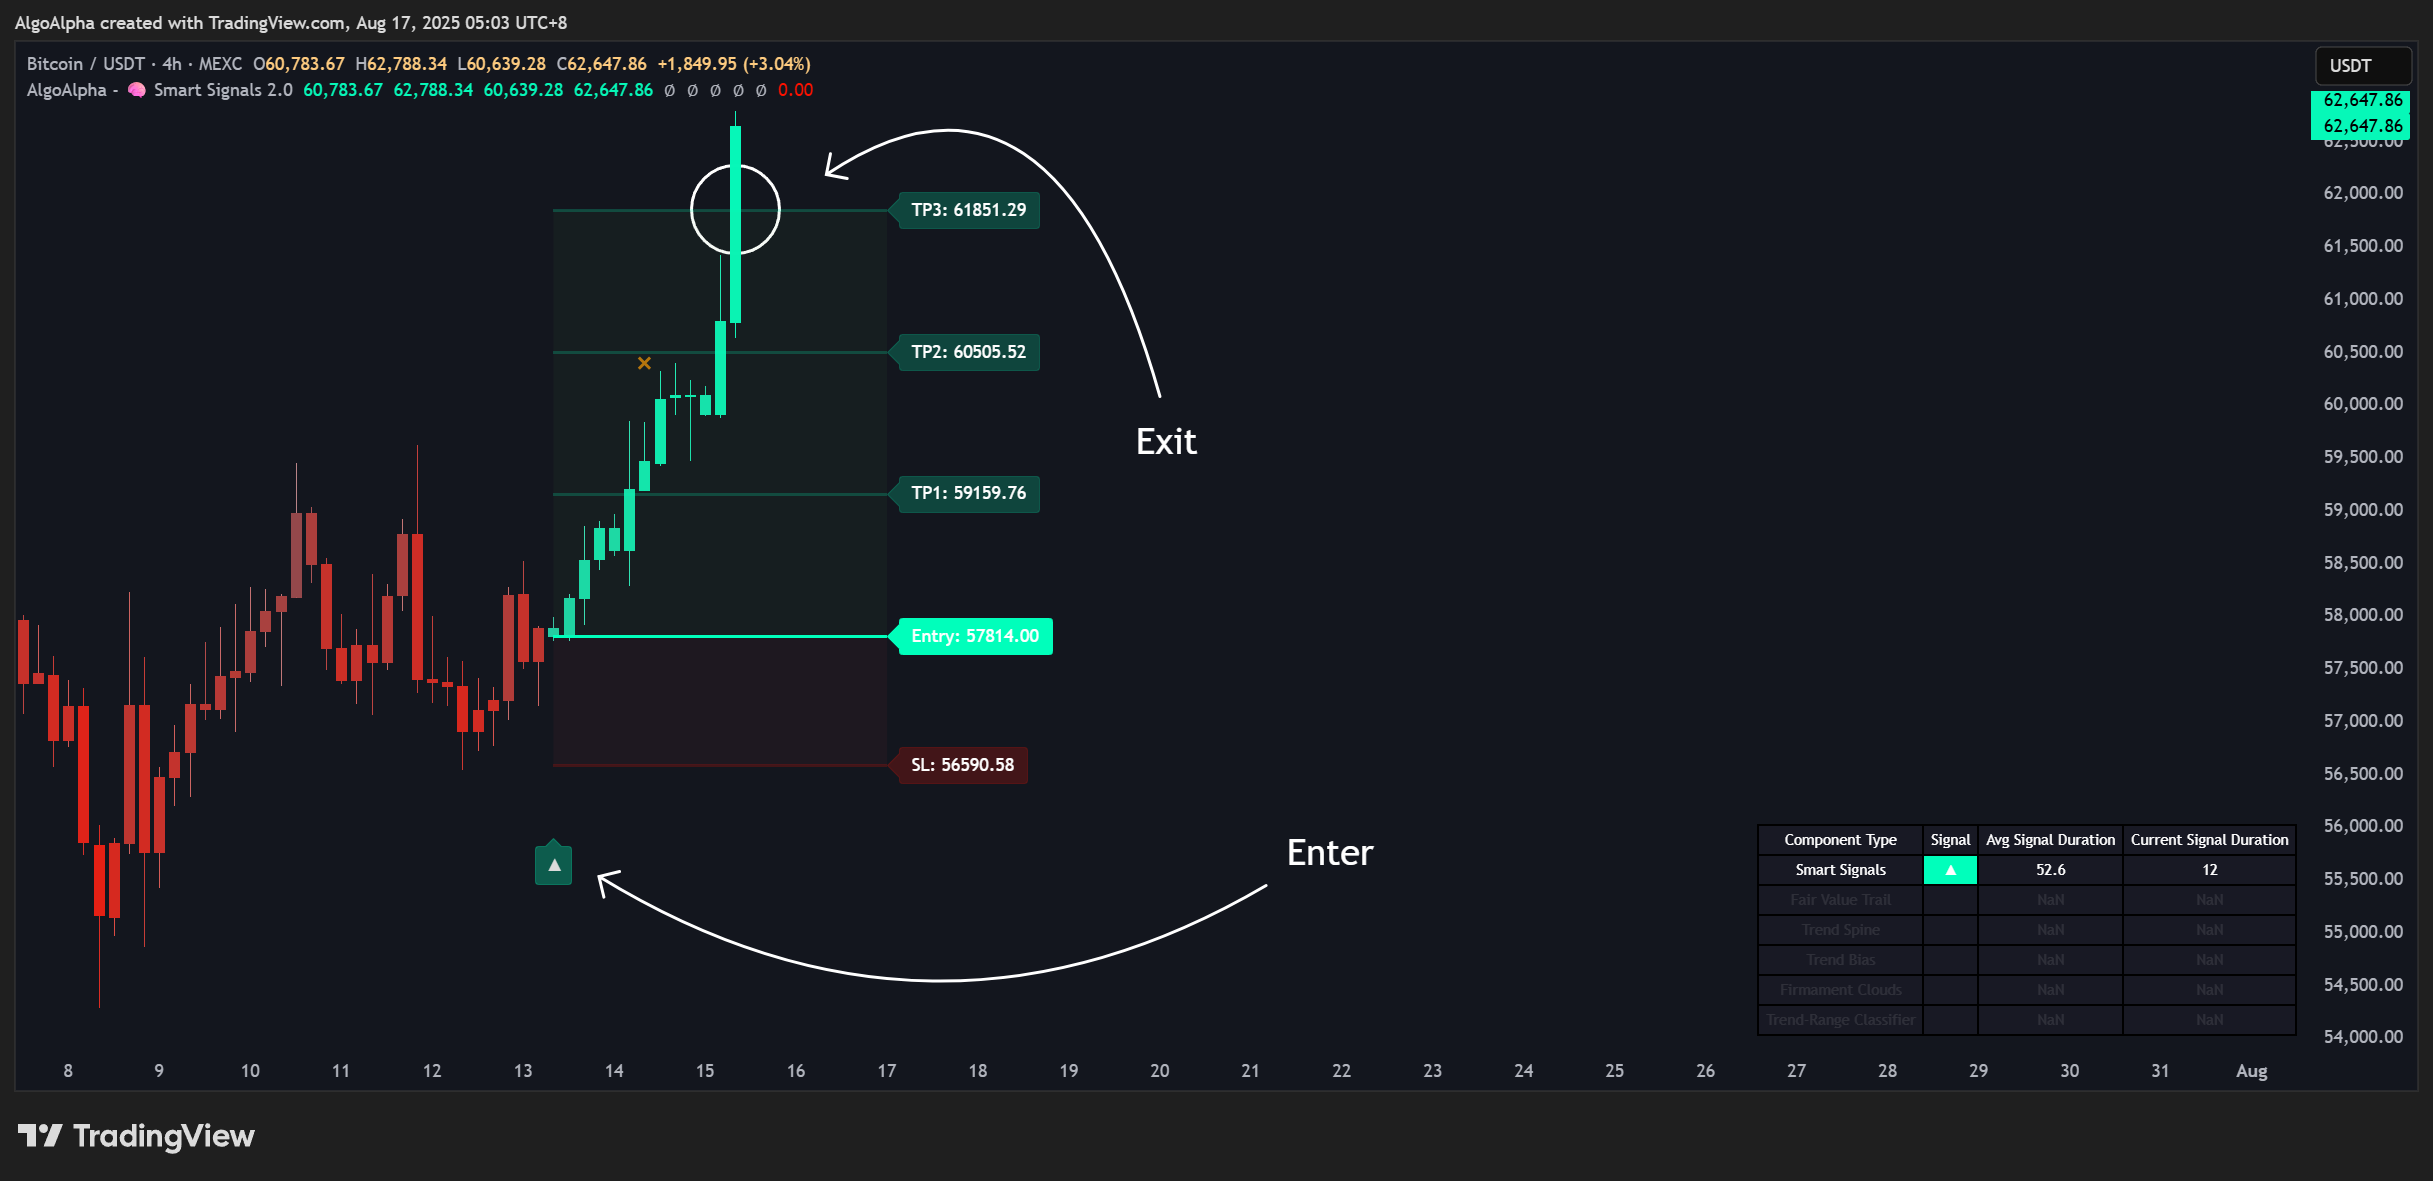
This example demonstrates how to build a strategy using signals from the Smart Signals Assistant (SSA) indicator.
Strategy Goal:
- Entry: Enter a trade when a Normal or Strong "Smart Signal" appears.
- Exit: Close the trade if an opposing Smart Signal appears (a strategy "flip") or if the SSA built-in TP/SL levels are hit .
Configuration Steps:
-
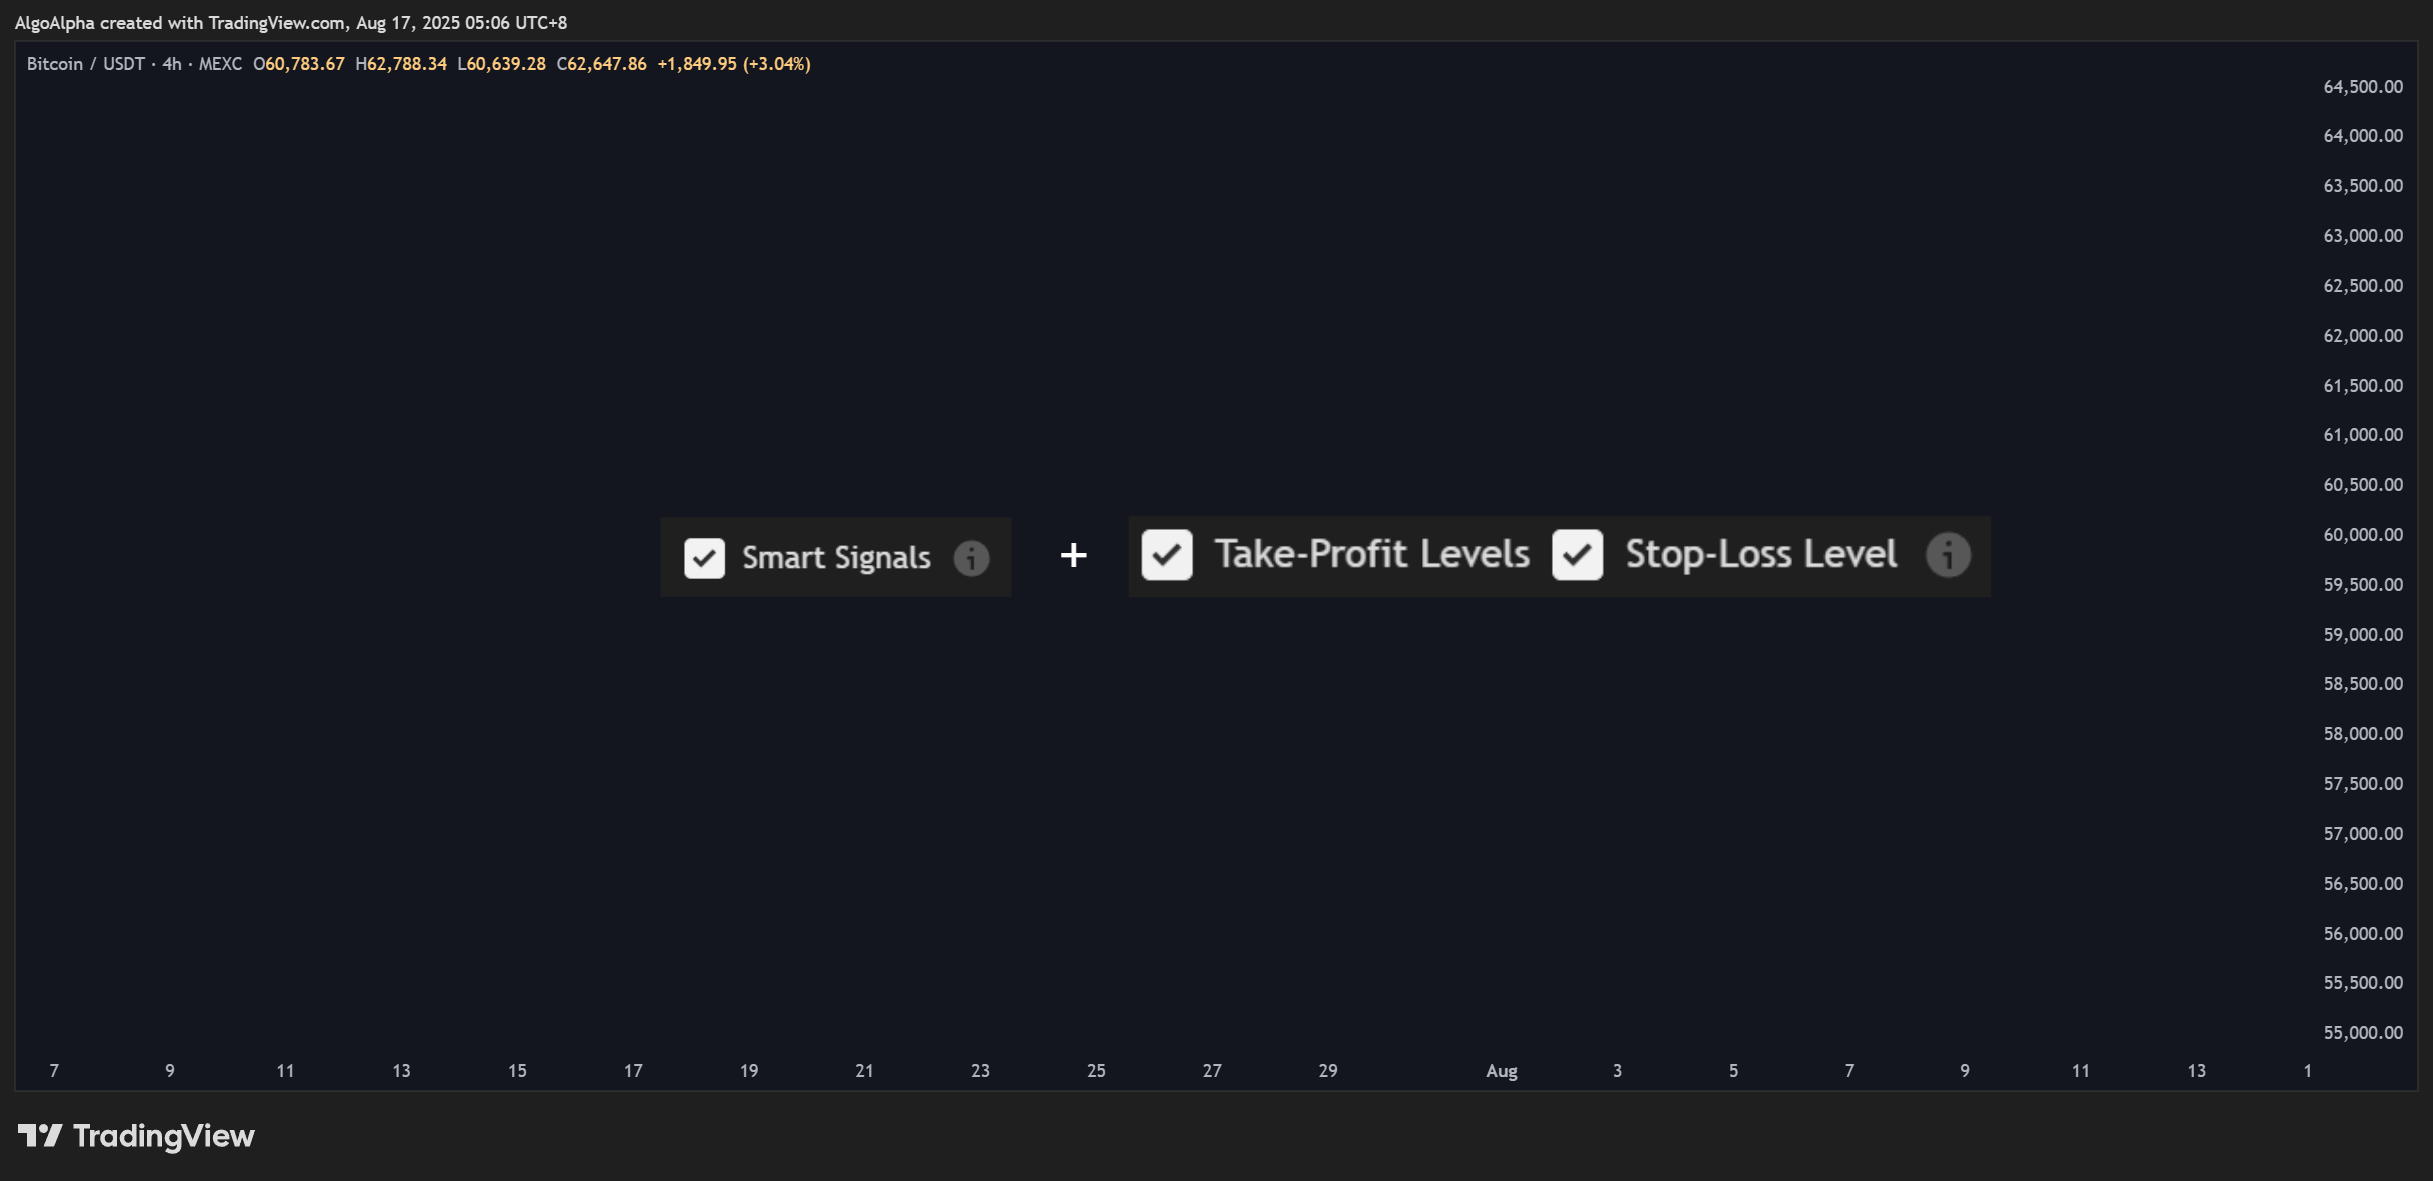
Prepare Indicators:
- Add the
Smart Signals AssistantandBacktest - Strategy Builderto your chart. - In the SSA settings, ensure Smart Signals are enabled and Take-Profit/Stop-Loss Levels are enabled.
- Add the
-
Disable Atlas Mode: In the Strategy Builder settings, uncheck Use Atlas in the "Atlas Strategy Conditions" group so the Manual Mode settings appear.
-
Configure
Long Trigger:
We want the entry to trigger on a Normal OR a Strong Bullish signal. Both signals are built-in to the backtester's Condition dropdown — no External Signal wiring required.
- Condition 1: Enable, select
Smart Signals ▲ Fires [Trigger] (SSA), assign toStep 1. - Condition 2: Enable, set the Boolean to
OR, selectSmart Signals +▲ Fires [Trigger] (SSA), assign toStep 1.
A shortcut for the same logic is to use the combined trigger Smart Signals +▲/▲ Fires [Trigger] (SSA) in Condition 1 alone — it fires on either a normal or strong bullish signal in a single line.
- Configure
Short Trigger:
Mirror of the long trigger:
- Condition 1: Enable, select
Smart Signals ▼ Fires [Trigger] (SSA), assign toStep 1. - Condition 2: Enable, set the Boolean to
OR, selectSmart Signals +▼ Fires [Trigger] (SSA), assign toStep 1.
Or use the combined Smart Signals +▼/▼ Fires [Trigger] (SSA) in Condition 1.
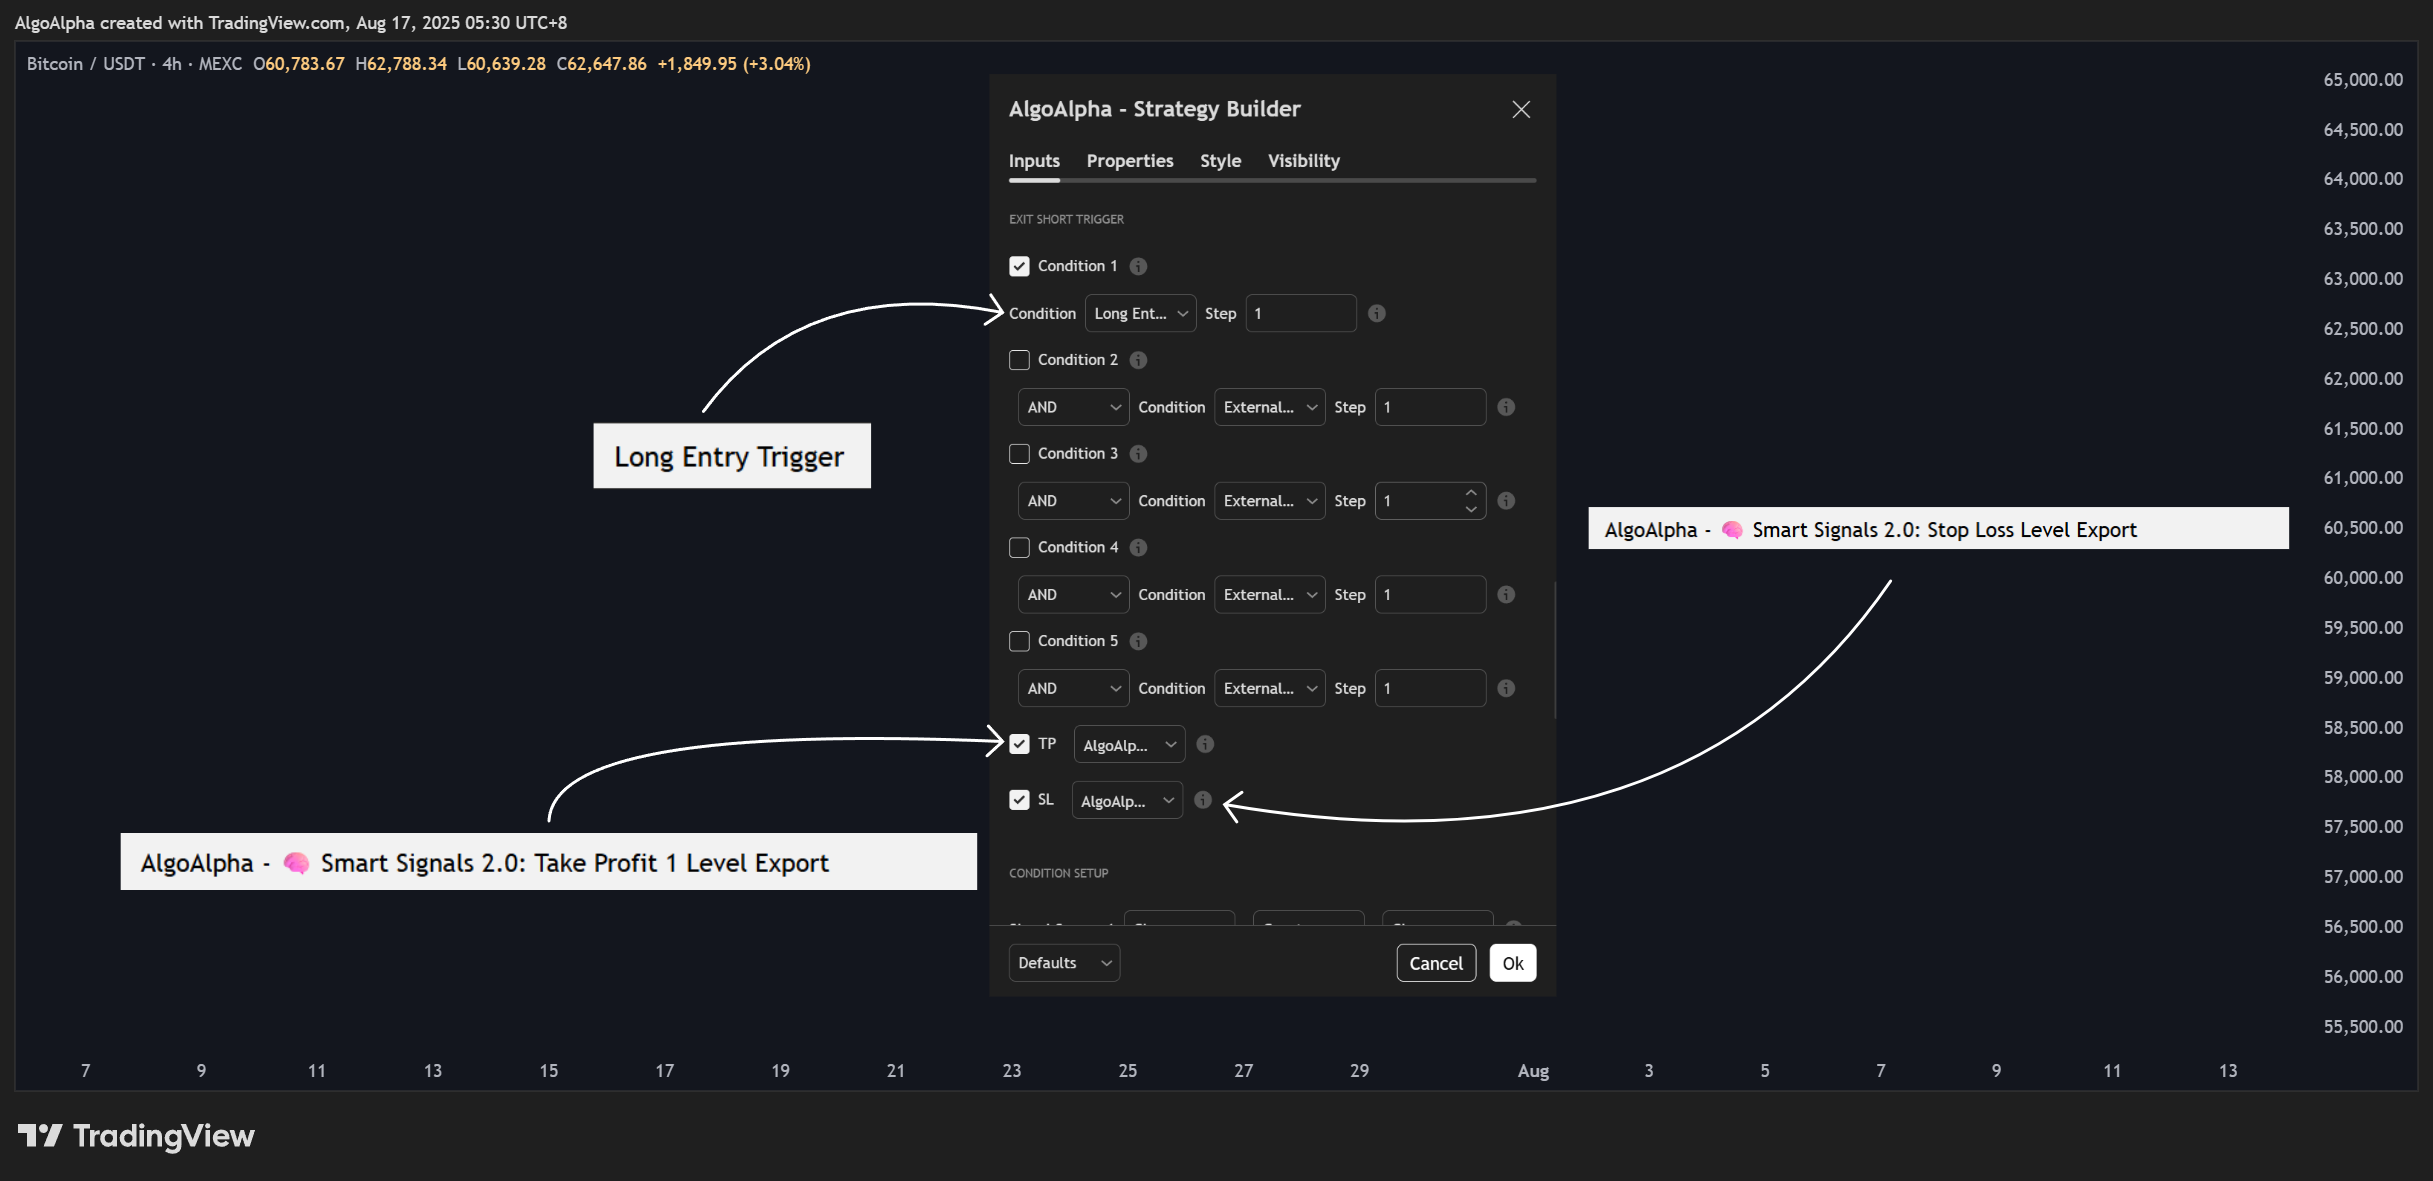
- Configure
Exit Long Trigger:
We'll build a comprehensive exit rule. The position will close if the Take-Profit (TP) is hit, the Stop-Loss (SL) is hit, OR if an opposing short signal appears.
- Set up the Flip Condition:
- In the
Exit Long Triggersection, enableCondition 1. - From the "Condition" dropdown, select
Short Entry Triggerand assign it toStep 1.
- In the
- Set up the Take-Profit and Stop-Loss:
- In the same section, check the box to enable TP. Click the source input next to it and select the plot from the Smart Signals Assistant for your take-profit level (e.g.,
Take Profit 1 Level Export). - Check the box to enable SL. For its source, select the
Stop Loss Level Exportplot from the Smart Signals Assistant.
- In the same section, check the box to enable TP. Click the source input next to it and select the plot from the Smart Signals Assistant for your take-profit level (e.g.,
Configure Exit Short Trigger:
The logic is identical but reversed for short positions.
-
Set up the Flip Condition:
- In the
Exit Short Triggersection, enableCondition 1. - From the "Condition" dropdown, select
Long Entry Triggerand assign it toStep 1.
- In the
-
Set up the Take-Profit and Stop-Loss:
- Enable TP and SL, linking them to the same
Take Profit 1 Level ExportandStop Loss Level Exportplots from the SSA. The indicator automatically calculates the correct levels for short positions.
- Enable TP and SL, linking them to the same
Make sure the TP and SL levels are enabled in the SSA indicator as the calculations are turned off when not in use, the export levels will return 0 if TP/SL levels are disabled
If you don't have an external source for SL levels, you can adjust the leverage to bring the liquidation price closer to the entry, just remember to adjust the amount of capital in a trade to avoid over allocation!
Your strategy now has a complete trade management plan. It will enter a long position on a bullish signal and will exit based on whichever of these three conditions occurs first: the take-profit is hit, the stop-loss is hit, or a bearish entry signal triggers a flip.
5. Understanding the Dashboard
The on-chart table provides a quick status check and performance summary.
- Trades Status:
ON: The strategy configuration is valid and running.OFF: The strategy is paused due to an invalid setup.
- Longs/Shorts Status:
READY: The side is correctly configured with both entry and exit rules.BLOCKED: The side is disabled. The reason (e.g., "No Exit") is shown in theValuecolumn.
- Warnings:
!: Your setup has an error (e.g., an entry is enabled without an exit). The specific error is listed in theValuecolumn.OK: The configuration is valid.
- Performance Metrics: Displays key statistics like Net Profit, Win Rate, and Max Drawdown.
Agent Instructions
This documentation is published with GitBook. GitBook is the documentation platform designed so that both humans and AI agents can read, navigate, and reason over technical content effectively. Learn more at gitbook.com.
Querying This Documentation
If you need additional information that is not directly available in this page, you can query the documentation dynamically by asking a question.
Perform an HTTP GET request on the current page URL with the ask query parameter:
GET https://algoalpha.gitbook.io/algoalpha-user-manual/premium-indicators/backtest-strategy-builder/practical-example.md?ask=<question>The question should be specific, self-contained, and written in natural language. The response will contain a direct answer to the question and relevant excerpts and sources from the documentation.
Use this mechanism when the answer is not explicitly present in the current page, you need clarification or additional context, or you want to retrieve related documentation sections.